< - - Back to K&J Comics

Alot goes into the making of a comic strip and there are many different ways to go about it. This tour will guide you through the step-by-step process involved in producing one particular comic strip, that being Kim & Jason. If you were hoping to see how Charles Schulz created his universally famous comic strip Peanuts, please accept our apologies.
Below you will see the tools that are used to create the strip. High tech gadgetry, to be sure.
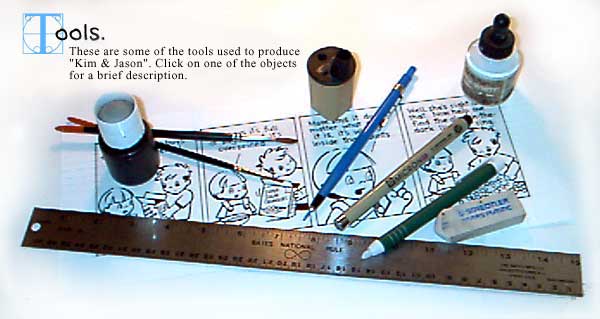
- Brush and Ink: A size 0 Red Sable watercolor brush is used to apply black india ink in the final stages.
- Lead Pointer: This is kinda like a pencil sharpener. It’s used to keep the leads in the lead holder nice and pointy.
- Non-Photo Blue Pencil: A lead holder complete with a non-photo blue pencil is used for lettering, guidelines and the drawing of the strip.
- Pen White: Believe it or not, mistakes are sometimes made, and when this liquid correction fluid is applied with a brush, no one has to know.
- Technical Pen: The Pigma Micron black technical pen is handy for lettering, straight lines, and for drawing moustaches on my wife while she is sleeping.
- Erasers: By golly, these look just like erasers. I’m not going to tell you what I use these for, it’s a secret.
- Ruler: Makes great straight edges. I’m not sure what the numbers are for, though.
 Scribbling In A Sketchbook
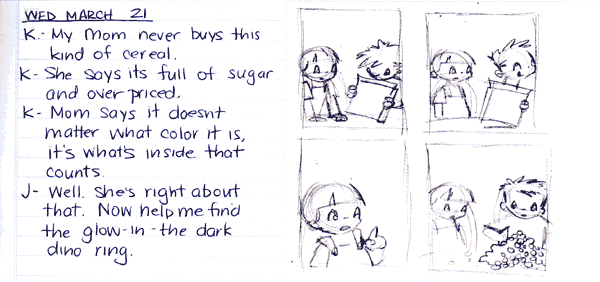
Most cartoonists will tell you that the most difficult part of producing a comic strip (other than trying to make a living at it) is the writing. I definitely share this opinion. I block out several hours each week to write and doodle. Some days are more productive than others, but I find it to be more effective to actively pursue creativity than to sit back and wait for it to arrive. Writing good storylines takes practice and persistence. And when I come up empty, I just buy gags on eBay®.
Once I feel like I have a pretty good concept to work with, I hammer out the dialogue, tweaking it into a more concrete form, paying attention to comedic timing. Because comic strips allow a very small space in which to work, it is vital to make the dialogue as concise as possible. A comic strip, as you might have guessed, is not the preferred format for writing dissertations.
In the sketchbook, I’ll quickly draw some thumbnails of the panels, figuring out how I want the visual story to unfold. In this stage, I’m thinking about pushing the envelope, searching for unique perspectives and camera angles to provide maximum interest. (Click any of the images for a larger view.)
 Boxing In
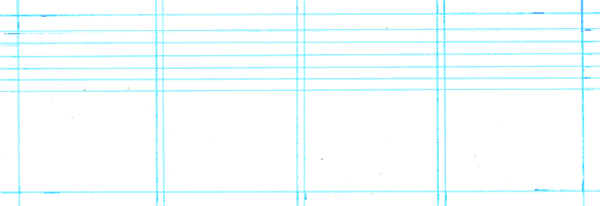
When the thumbnails and dialogue have been worked out, I use the non-photo blue pencil to draw some guides on a blank sheet of 5 1/"2 x 14" bristol board. I draw the border of the strip and mark off however many panels the particular strip requires. The example below shows a pretty standard four-panel setup. I use this format the majority of the time, but I like to play with a lot of different formats, sometimes using the entire area for one panel.
I also mark off straight baselines for the lettering. Because the strip will be reduced down and can be printed in a variety of different mediums, careful attention to lettering is a must.
Unquestionably the most awe-inspiring step.
 The Blue Period
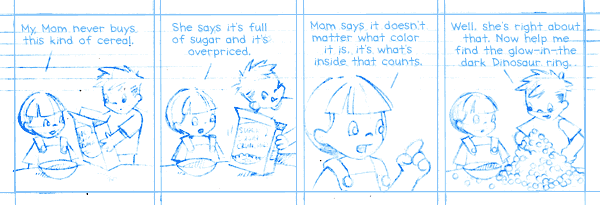
This is my favorite part. Charles Schulz believed that the comics that people will read on a comics page are the ones that are fun to look at. I really enjoy drawing for Kim & Jason and I also like to draw funny visual gags.
With the quick thumbnails in my sketchbook as a guide, I begin laying out the composition of the strip, again in non-photo blue pencil. I use the blue pencil because it does not show up when photocopied, so I can do a base drawing such as this without having to worry about erasing the lines later. I’m not a big fan of erasing, plus I love the color blue, so it really works out well for me.
During this step I also carefully pencil in the lettering, and continue to tighten up the drawing. Spacing of the words and letters are important, because surprisingly, it can be difficult to read a comic strip when the end of sentences are bunched up against the side of the panel like an 18-car pileup.
 Letters And Boxes
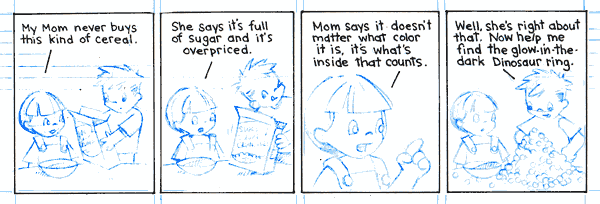
Grabbing hold of one of my technical pens, I carefully draw the borders of the strip first, then I ink the lettering. Note: This is a very dangerous step that should not be done without close supervision of a friend. It is extremely boring and tedious.
As you may or may not have noticed, I use different typefaces for some of the different characters to enhance their personality and add variety to the strip. I still do all the initial lettering by hand so that I’m sure I’ll have enough room when I add the other typefaces later with the computer. I also created a computer version of the handwriting font I use for Kim & Jason.
 Bring In The Ink
Cartoonists use all sorts of materials to "ink" their strips, including permanent markers, technical pens, and black colored pencils. I prefer to use a sable watercolor brush with black india ink. It may be the trickiest tool to master, but it can produce an array of beautiful lines that can add an unparalleled level of richness and depth to a drawing. I enjoy the challenge of honing my skills in an attempt to imitate some of the great masters, like Bill Watterson (Calvin & Hobbes), Walt Kelly (Pogo) and Pat Brady (Rose Is Rose).
I ink the entire strip with the brush, with the exception of some detail work that I leave to Mr. Technical Pen. He sure is good to have around.
 Scan This
When the manual work is done and the strip is completed, I scan the strip into the computer. I use a fabulously fast and strikingly elegant widescreen G4 iMac for all of my work. I heartily endorse Apple computers as the premier soution for all your computing needs, but I must say that PC’s make unparalleled doorstops.
In this stage, I touch up any lingering mistakes and add any digital enhancements that are necessary, like special character typefaces or grayscale shading. If color is required, I add it to the strip during this step. I scan and enhance two versions of the strip; one low-resolution version for use on the web, and another high-res version that is suitable for printing. Both strips are saved and archived on CD for future use.
That’s it, I think. If you were wondering about something I didn’t cover here, you can always ask me. I hope this was a very educational and rewarding experience for you. Sorry – no refunds. But you can check out the Gallery for more artwork from the world of Kim & Jason.

